Saturday, July 27, 2013

Restoring the Bath

So honestly I was going to give up on the blog because I'd convinced myself that I was the only person reading it. And even I quit reading it. My wife lost the link about a dozen times and I have been doing a build thread on Garage Journal where the members were more enthusiastic about the house than my own family so I just kept updating that. Well, it seems that someone in MN is watching it and so I've been guilted into updating it.

The other problem I have with the blog is the lack of control over the layout and the photos. I'm a photographer and I want control to show off the photos and this blog format doesn't allow that. But enough about me...

On with the show.

Bathroom. We have but one so I wanted to make it nice. One of the things about an older house and something I struggle with every day it seems is things not being level. Things sag over time - something I need not remind anyone over 40 - and so care needs to be taken to not just slap trendy outfit on a sagging frame. It looks silly on people and sad on houses.

The other thing we did was go back to the traditional layout but with a much larger, deeper and nicer tub. We want to take advantage of the advances made since the 50's but keep the spirit.

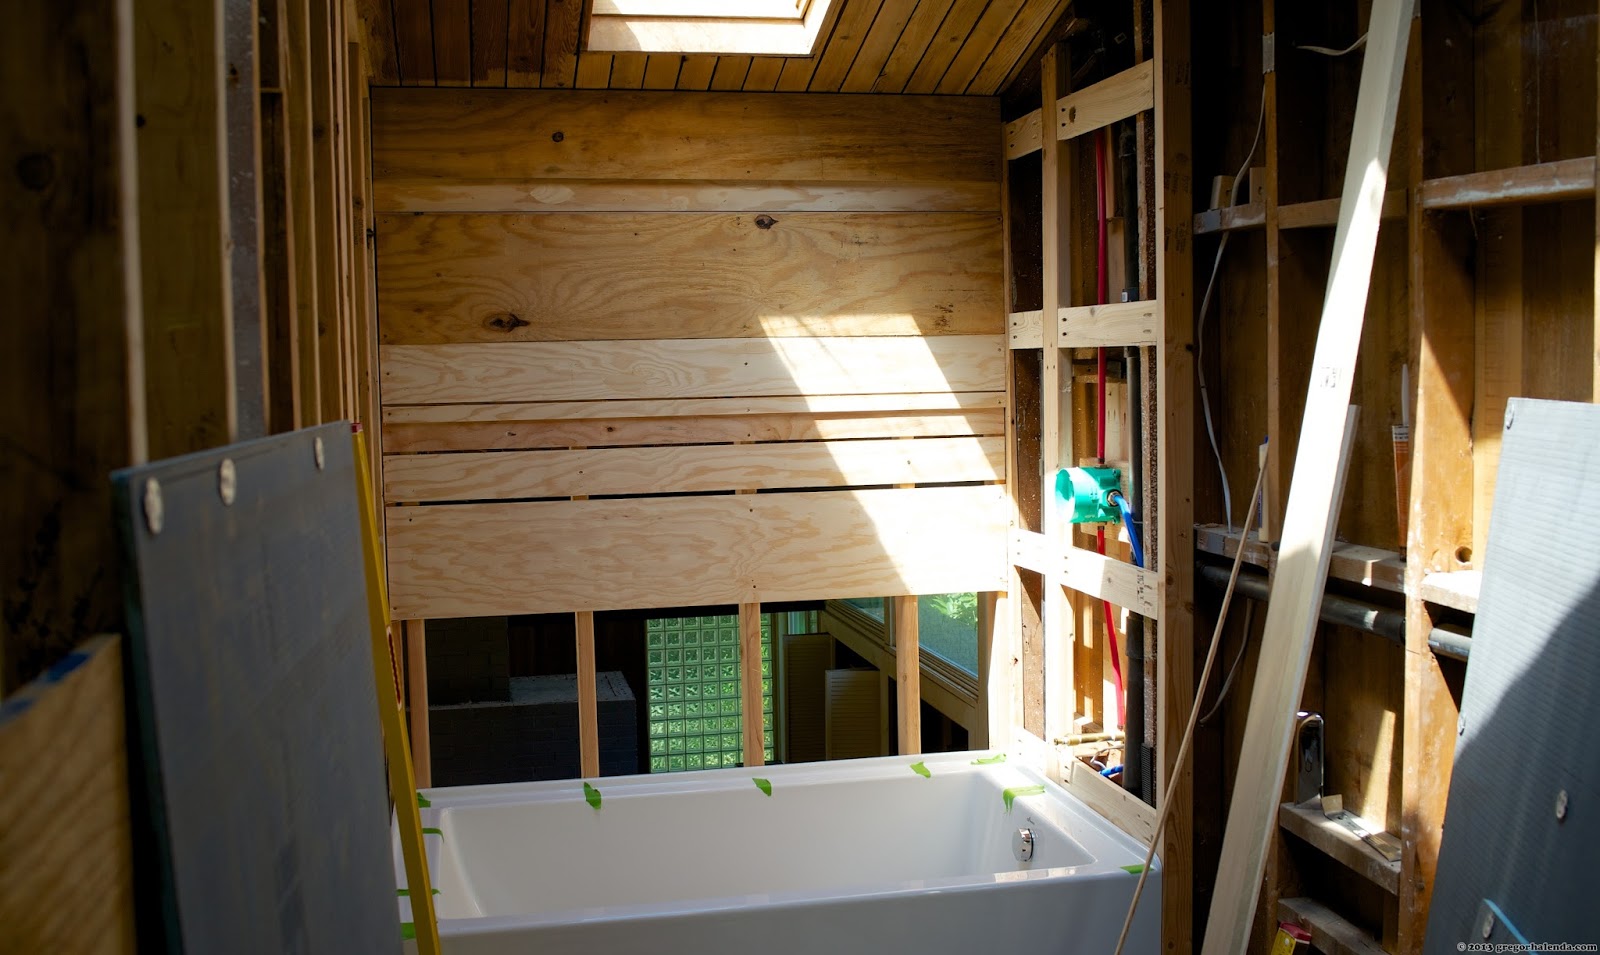
The tub is set, leveled, glued and back filled with foam underneath. All that plywood is various sized shims to level out the back of the tub. 

Here' I'm testing out the tile coursing. It almost fits.

The floor is 3/4 ply subfloor, 1/2 glued underlayment, 1/4 Hardibacker set with thinset and finally we get to the tile. 

Here I'm experimenting with the tile courses for the tub. Note the short legs at the tub - that is the area where the tub meets the wall. This, I learned, is wrong.


This is right - extending the tile past the tub 6" protects the "legs" where 90% of all tubs leak. Thankfully someone reading my thread pointed me to a plumbing blog where I was set straight. 

Now all the Wedi board is in place. This stuff is amazing. It's 1/2 foam with a cement layer on the front and back and when used with their sealant it's completely strong and waterproof. 


I don't like the sound of hollow walls - it sounds... hollow. So, despite the fact that it is meaningless as far has temperature we are insulating all the interior walls for the sound. 

This is construction foam. The entire underside of the tub is additionally supported and insulated by this foam. My friend Jacob gave me this tip as it helps make the tub more substantial feeling and eliminates any flex. A small detail but one that I will appreciate. 

Sheet rock in and I got a visit from the new tubs future user. She approves but has kept asking about her bunk bed.


This is the Nuheat radiant floor heating mat. It's set in thinset as well. The small space of the bath was perfect for a stock size mat which will keep the nice limestone tile warm in the winter. 

And the tile goes in. We went with a large tile in a standard offset. 

And the floor is set. Need to seal it and then do the epoxy grout next. 


Tuesday, June 18, 2013

Sanding, sanding, leveling, sanding and... Painting!

This is just a post to document some of the work we've been doing to remove the stupid whitewash finish on the cedar ceilings. Oh, how I'd love to have a word with the person who painted it...


These wonderful lights will be replaced with something from my friend John Pomp. Hi John!
That doesn't look hopeful does it? 

JorgĂ© is an animal - but also very patient and persistent. 


All that ceiling is done - the wall, not yet.

It's really a lot of cedar...

Seriously, that's a lot of sanding.

This is but a fraction of what we've gone through - literally 5 vacuum bags so far and hundreds of pads.
The porch and area near the entrance had strange endless mortar and we had to jackhammer forever.
The latex primer goes down for the self leveler. 

And then the self leveler go downs so our floor is nice and smooth.


This area made some nice patterns but the pour was great. 
This was a gray that I found on one of the exposed beams - I took a sliver... 
...and had it matched exactly. It's a nice medium gray. 
Each beam is sanded down, knots and nail holes are filled with bondo and sanded again. 
And finally, finally I see something I can be thrilled about...


The black satin was a perfect choice - it shows the grain as a texture and pattern but looks amazing. 
And the first wall is done as well. The space between the ceiling boards I'm waiting to see how I feel about it. 


Gas and Water

So since Judiaann and I both love to cook we wanted gas at the house. That meant running a line since it didn't exist. That meant getting a new hot water heater since the credit would almost pay for the heater. It was quite the dog and pony show when the gas crew showed up to put the line in to the house. They even used a dowsing wire to find the gas line. I kid you not. Anyway that allowed us to get a tankless heater which would work with the larger soaking tub we're putting in. In addition we're putting in some hot and cold water hose bibs so that we can fill the kids pool with warm water and wash motorcycles and bicycles with warm water as well. Nice!

Pex is fun to run but replacing the entire houses water system has really taken time. I have nothing to gauge from so I always think it will go faster. It never does. Big surprise.

In addition to the fun of the gas we also discovered that our water main was leaking under the house. Sort of good to find it now but not really something else I wanted to add to the plate.

Here's the third trench to get gas to the house. Lot of work for a good flame. 

This is some of the Pex being run - here to the laundry sink which is a new addition. 


This is the Pex manifold system. Almost there.

The tankless heaters venting and the lower bathroom vent (previously just vented into the wall...)

Here's the final Pex manifold and tankless heater - this was very satisfying to do!

A giant trench for a new 1" water main to the house. 

Inspected and then we covered it up. 


Righting Wrongs in the John

So I've been so busy that I've fallen far behind in this blog. Like almost everything else in my life besides the house and family it's fallen victim to the all encompassing void of both time and money that this house is. But I digress.

In oder to keep things in some semblance of order I'll just do the next few updates in groups and not really chronographically - it will be easier for me I think. Hence a post about a bathroom!

This "cove" or cutout made no sense. 

So it was removed.

This is the level of plumbing expertise I found...

Yes, that's duct tape holding these two pipes together.

First I cut out a panel where the sink would go. 

This makes it easier for the next step. 

And then I add 3/4" plywood so a sink can be screwed to the wall. 

Monday, May 13, 2013

Guts be Gone

So the past week has been one of turning a corner. Firstly I found a great helper who's reliable and conscientious and secondly we've pretty much run out of things to rip out so it's finally time to put things in instead. That makes me feel like there's light at the end of the tunnel.

This wall of cedar was the back of the master bedroom closet and the wall of the adjoining room. The door pretty much ruined the wall so we decided to remove it and reclaim the wood for other projects in the house. 

It was a bear to get out. About the same time we pulled the carpet to reveal the original cork floors. Not sure they're worth saving as they're in rough shape.

Framed up and ready to rock. 

And all rocked out. The closet will be built in but that will happen later.  
The original cast iron drains went right in the middle of the bath leaving no room  for the shower controls. It was easier to tear it all out and start from scratch than try to work around things.

Here the drains are now clear leaving room to have centered shower controls.
This was a lot of work to get a second sink in the kitchen but it will also allow me to have my espresso machine drip tray just drain to the line.


We're about halfway through stripping the ceiling.