Tuesday, November 5, 2013

Cable Railing Replaces... What Were They Thinking?

I realized recently that I'm coming up on 10 months that I've been doing this. Single handedly restoring a house and learning the process as you go is time consuming and costly. Of course it's a fraction of the cost as if I were to hire out the process but I'm paying in time.

Anyway, this was a thing that I've been wanting to do forever and just never had a house. I love the sleekness of cable rail and I love the marriage of wood and metal. Finally, here was my chance to bring the skills of welding and woodworking together.

This is my "story pole" and jig to drill the holes exactly 3" apart in the posts.

You need to cut the cable with a grinder and use tape to keep it from fraying. 

I used my mill to drill out the rail and spacers and the center drill here made nice countersinks. 
Unlike typical architectural welding which is Mig I use Tig which is finer and more controlled. 

It's a slower process but the results are far nicer and neater. 


Cables cut and ready to be swaged with their threaded ends. 

I went with a clear stain to keep the lightness that is similar to the new cedar in the recess there. Countersinks neaten the look of the holes into the beam. 

The span is 3' between supports which is more than adequate to provent the theoretical 4" sphere from passing through. 


This is what it looked like when we first saw it. You have to see this to appreciate the next shot. 
This is truly a transformation that gives me hope and I keep going. 

Sunday, September 8, 2013

Slow Progress

So I'll do this with captions as that's the easiest way. Most of the work recently has been on finishing details and it's been slowed by work of the kind that pays for the work on the house. I've had time to consider the direction of the finishing details and I like the way they're going. On occasion I'll walk into the house and see a small section and can suddenly imagine living here and I get a burst of energy but more often the work is painfully slow doing by myself. It's also very rewarding which I like since I feel so connected to the house now more than ever. It is very much like the restoring of a motorcycle and the satisfaction that comes from that. Moving in will be like the first ride. 


The bathroom is finished save for the vanity that I need to build. I'm quite happy with the result. 
To the end of building the kitchen cabinets and the various other vanities and built ins I've started work on garage cabinets as my "practice" and my first effort provided many lessons.

When you consider this is just for the garage I think I'm off to a good start. I found a lot of mid-century pulls for $15 so that will help finish the cabinet in a nice period fashion. 
I'm doing the garage in a full Euro 32mm Faceless and the rest of the house will follow suit. It's the most clean design although it's more time consuming to build.
And because I'm a glutton for punishment and want this to be a true gem of a house I've decided to dovetail all the drawers just to take it to the next level. This is my first practice box and it's fairly good.
To finish the beams I've decided to face them in cedar to match the ceiling and walls and then sandwich them in 3/4 hemlock painted black to match the rest of the details. It was difficult to find a "true" 3/4" board to match the dimensions of the existing trim but we found it. Lumber dimensions from the 50's to now have changed quite a bit. 
Here's one of those beams at the loft - one of the few non original detail changes that we're keeping but trying to incorporate into the original aesthetic. 


Here you can see the progress of the beams but also the trim and windows are all being painted black. This has made a HUGE difference to the look and feel of the house. It's encouraging. 


The house as we bought it was decorated in the 80's style of "clown threw up on the walls" with purple, mauve, yellow and green violating the dignity of design. It's great to see the graceful lines restored and the dignity regained.

Little by little it's coming together. 


And the garage is also coming along as it will serve and the test bed and work center for the rest of the house. Here the ceiling has been painted white and the beams black. VCT floor has been ordered which will give the space the feel of a 1950's development lab and brighten it further. 

Wednesday, August 7, 2013

Finally getting to finishing, or at least finishes

I gotta say, one of the reasons I don't like to post here as much as the Garage Journal board (where I'm keeping a similar, more frequently updated thread) is that the layout and control of the photos is just horrible. Yuck. 

Anyway. 

Here's the past week or two compressed. Lots of stuff happening and the captions are easier to do than try to get type to flow between photos. 


We tore out the built in that was added. I'm not about to completely eliminate them so I'm going to try to figure out how to make them seem original. The white between the windows we've figured out was always cedar and so we're trying to replace any instances of dry wall with cedar. 

Here's our evidence. Edging and window trim was gray, beams were faced in cedar. 

Here' I'm facing one of the beams. In places where there is dry wall I'll add a trim board to mimic the windows and frame the cedar. 
This gives you an idea of where that is going. That panel to the left was yellow. The windows trim will all go black instead of gray in keeping with his later houses and traditional style mid-century look. Also, it looks great. 
This trailer brings our current total to four tons of tacky and poor decisions that have been taken to the local dump. 

The other thing we're doing is matching the texture. Never used to like texture but suddenly I really dig it. It's very good at hiding things but let's be honest - we have nothing to hide. It's coming out great. 

The process is to dilute drywall compound, splatter it on the wall in a random way and then let it set up just enough so the small drops harden. Then "knock down" the bumps to give the wall that relief-map-of-islands-look. 
Finished texture but before primer. Paint and primer soften the look a bit. 

The kitchen we replaced every wall and surface so no texture to match there - it all goes smooth. 
This tile is called "jet black" I think but it's dark gray. I agonized about the choice but our architect Ben King suggested we have three tones to create a "chord" of color and suddenly it made sense.

Tile set centered on back and wrapped with the addition of legs 6" past the tub to help prevent water egress.

Went with 1/8 spacing which was as narrow as I felt like I could go without looking trendy. The extra long subway style tile has a classic feel. 

All set and ready for clean up and grout. 


Saturday, July 27, 2013

Let's Rock This Place

And by that I mean sheetrock.

Blessedly, finally and mercifully we've arrived at the sheetrock stage. That's the stage where all the work you've done up to this point gets covered up and is never seen, nor appreciated again. It's hopefully just taken for granted because it works.

This is that hidden window we discovered when we removed the cabinets in the back corner of the kitchen. The back wall here was becoming a problem that was taking more time to fix than...

...it would be to just rip out and start over. In my mind I hear my father, "If you're going to do something do it right." and so the wall goes away so we can make one that it straight and true. 

As the jumble of mixed up boxes, walls, soffits and ceilings came out we discovered... wait for it... MORE WINDOWS! 

Will wonders never cease - the window runs the full length of the wall. Painted over because they built the hideous deck over it with the giant brown hot tub. That will all be rectified in stage two which will be the exterior and the landscaping. 

New door, new wall and we're going to leave just a hint of the beam exposed to carry the theme through to the back of the kitchen as well. 


The kitchen is now fully sheetrocked. The wall in back was done with 3/4 plywood instead of sheetrock so as to add some lateral stiffness to the house. Not needed but nice and easy to do. It will also make the hanging of cabinets in the back a cinch. 

Restoring the Bath

So honestly I was going to give up on the blog because I'd convinced myself that I was the only person reading it. And even I quit reading it. My wife lost the link about a dozen times and I have been doing a build thread on Garage Journal where the members were more enthusiastic about the house than my own family so I just kept updating that. Well, it seems that someone in MN is watching it and so I've been guilted into updating it.

The other problem I have with the blog is the lack of control over the layout and the photos. I'm a photographer and I want control to show off the photos and this blog format doesn't allow that. But enough about me...

On with the show.

Bathroom. We have but one so I wanted to make it nice. One of the things about an older house and something I struggle with every day it seems is things not being level. Things sag over time - something I need not remind anyone over 40 - and so care needs to be taken to not just slap trendy outfit on a sagging frame. It looks silly on people and sad on houses.

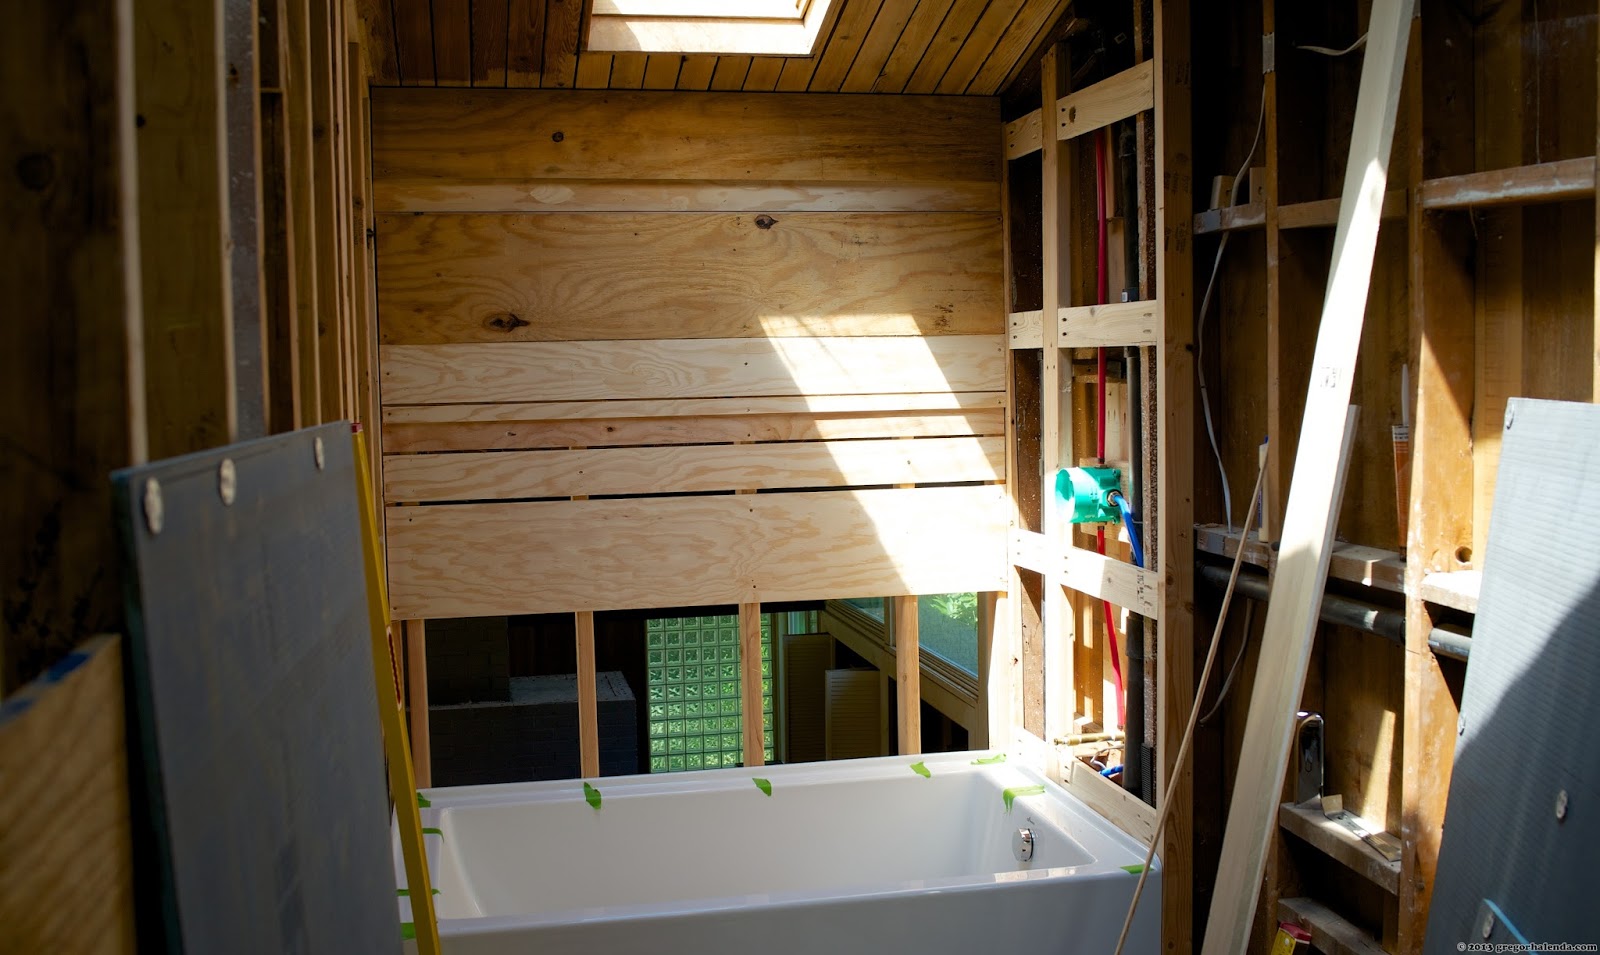
The other thing we did was go back to the traditional layout but with a much larger, deeper and nicer tub. We want to take advantage of the advances made since the 50's but keep the spirit.

The tub is set, leveled, glued and back filled with foam underneath. All that plywood is various sized shims to level out the back of the tub. 

Here' I'm testing out the tile coursing. It almost fits.

The floor is 3/4 ply subfloor, 1/2 glued underlayment, 1/4 Hardibacker set with thinset and finally we get to the tile. 

Here I'm experimenting with the tile courses for the tub. Note the short legs at the tub - that is the area where the tub meets the wall. This, I learned, is wrong.


This is right - extending the tile past the tub 6" protects the "legs" where 90% of all tubs leak. Thankfully someone reading my thread pointed me to a plumbing blog where I was set straight. 

Now all the Wedi board is in place. This stuff is amazing. It's 1/2 foam with a cement layer on the front and back and when used with their sealant it's completely strong and waterproof. 


I don't like the sound of hollow walls - it sounds... hollow. So, despite the fact that it is meaningless as far has temperature we are insulating all the interior walls for the sound. 

This is construction foam. The entire underside of the tub is additionally supported and insulated by this foam. My friend Jacob gave me this tip as it helps make the tub more substantial feeling and eliminates any flex. A small detail but one that I will appreciate. 

Sheet rock in and I got a visit from the new tubs future user. She approves but has kept asking about her bunk bed.


This is the Nuheat radiant floor heating mat. It's set in thinset as well. The small space of the bath was perfect for a stock size mat which will keep the nice limestone tile warm in the winter. 

And the tile goes in. We went with a large tile in a standard offset. 

And the floor is set. Need to seal it and then do the epoxy grout next.